Bathroom Tub Renovation Near Me: Data-Driven Insights into Costs and Value

Categories Home Improvement

Numbers don’t lie — tub renovations can significantly boost your home’s comfort and value. This article outlines average costs, ROI, and sustainability benefits based on national and regional data, helping homeowners make data-backed remodeling decisions that last.

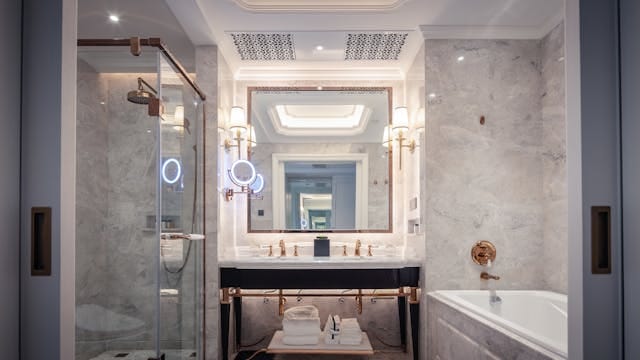
When planning a bathroom remodel, emotion often drives design — but data determines value. If you’re exploring tub and shower renovation professionals to upgrade your space, understanding costs, trends, and long-term returns can help you make smarter decisions.


The Numbers Behind Tub Renovations

According to the National Remodeling Index and leading contractor reports:

  • Average mid-range tub remodel: $6,000–$10,000

  • Upscale luxury remodel: $12,000–$25,000+

  • Return on investment (ROI): 60–68% depending on materials and finish

  • Average completion time: 4–7 days for installation and finishing

These numbers vary based on regional labor costs and material selection, but one trend remains clear — high-quality workmanship consistently yields better ROI.


How Materials Affect ROI

MaterialAvg. Cost InstalledLifespanTypical ROI
Acrylic$2,500–$5,00010–15 years60%
Fiberglass$2,000–$4,0008–10 years55%
Cast Iron$6,000–$10,00040+ years68%
Solid Surface$8,000–$12,00030+ years65%

While budget materials save upfront, premium ones like cast iron or solid surface increase longevity and resale appeal.


What Homebuyers Value Most

Recent home resale surveys show:

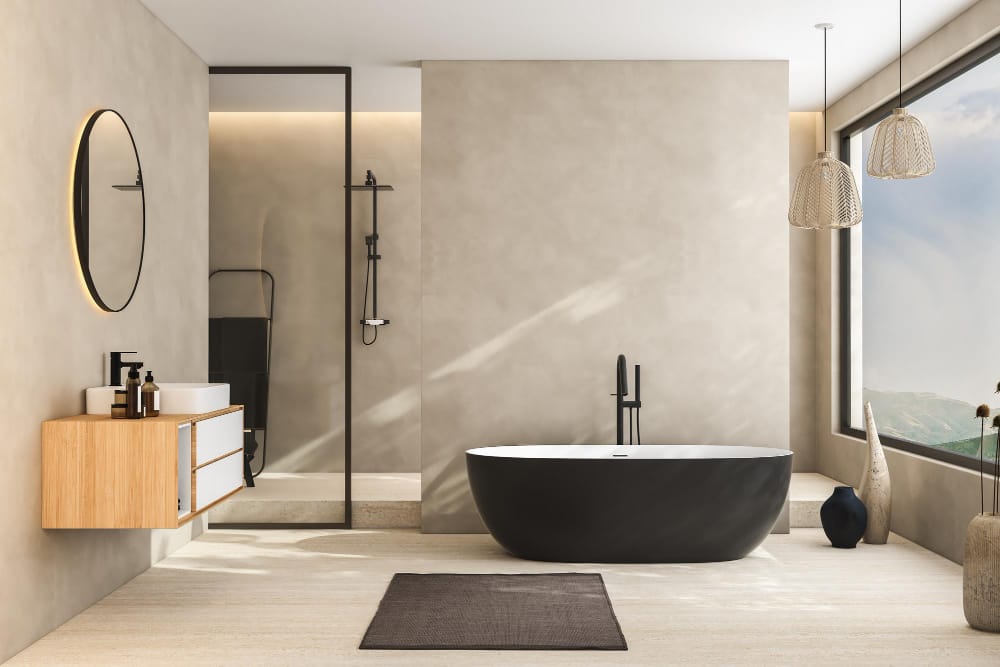
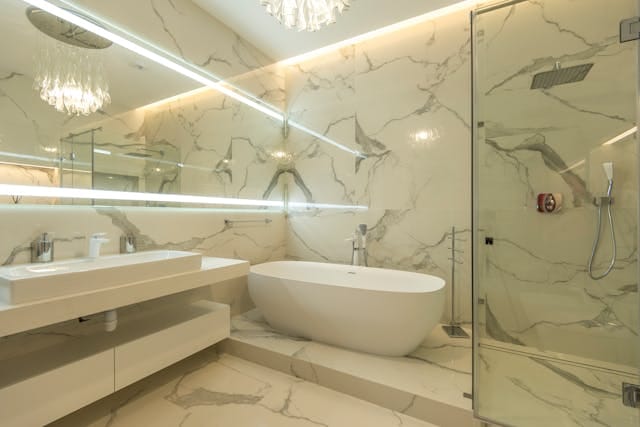
  • 71% of buyers prefer freestanding soaking tubs for modern homes.

  • 63% rate a newly remodeled bathroom as a top selling point.

  • 48% say spa-style upgrades influence their offer price.

This proves even modest investments in tub upgrades can enhance overall property desirability.


Efficiency and Sustainability Gains

Sustainability has become a key remodel driver. Energy-efficient fixtures and water-saving tubs reduce operating costs while supporting eco-friendly living:

  • Low-flow faucets and showerheads: Save up to 2,700 gallons of water annually.

  • Tankless water heaters: Cut energy use by 20–30%.

  • Recycled materials: Reduce construction waste by up to 40%.

Homeowners pairing tub renovations with designer-level bath enhancements see the best long-term gains — both environmentally and financially.


The Local Advantage

Working with nearby professionals means faster completion and stronger warranty support. Local experts understand regional preferences, codes, and building requirements, helping avoid costly delays or revisions.


Builder’s Notes

The data speaks volumes: thoughtful tub renovations increase comfort, efficiency, and resale value. With the right professionals, homeowners can turn cost data into real-world design success.

👉 Before you start, ask contractors for detailed cost breakdowns, ROI projections, and warranty coverage. In remodeling, information is your strongest tool.

Bathroom Tub Renovation Near Me

Kitchen Remodel Sacramento: 5 Smart Moves That Changed Everything

Categories Home Improvement

A kitchen remodel in Sacramento changed one family’s life. By opening the layout, upgrading countertops, adding storage, improving lighting, and building an island, we created a space that blends beauty, function, and connection.

Every kitchen has a story. In Sacramento, I worked with a family who loved to cook together but felt trapped by their outdated space. Dark cabinets, cramped counters, and a layout that cut the chef off from the rest of the family made their kitchen more of a burden than a joy. They didn’t just want new cabinets or shinier appliances—they wanted a kitchen that felt like the heart of their home again.

The remodel didn’t happen overnight, but five smart moves transformed the space completely. If you’ve been thinking about a kitchen remodel in Sacramento, here are the strategies that turned chaos into comfort, and function into beauty.


1. Opening the Floor Plan

The Problem: The old kitchen was cut off from the living room by a half wall, making the cook feel isolated.

The Move: We removed the barrier, creating an open-concept design. Suddenly, the kitchen became part of the family’s daily rhythm. Conversations flowed, natural light expanded the space, and entertaining became effortless.

The Lesson: Sometimes the most powerful remodel decision isn’t about finishes—it’s about connection.


2. Upgrading to Quartz Countertops

The Problem: The family’s laminate counters were worn, stained, and constantly in need of attention.

The Move: We swapped them for durable quartz countertops. Not only did they bring a polished, modern look, but they also offered resistance to scratches and spills—ideal for a family that uses the kitchen daily.

The Lesson: Choose materials that balance style with long-term durability. The right surfaces make everyday living easier.


3. Smart Storage Solutions

The Problem: Cabinets were overflowing, and essentials were buried in hard-to-reach corners.

The Move: Custom cabinetry with pull-out shelves, vertical dividers, and a deep pantry changed everything. We added hidden storage for small appliances and a drawer system designed specifically for utensils and cookware.

The Lesson: A remodel isn’t just about what you see—it’s about how it works. Smart storage transforms clutter into calm.


4. Lighting That Layers the Space

The Problem: A single fluorescent fixture left the kitchen feeling flat and uninspired.

The Move: We layered the lighting: recessed ceiling lights for general illumination, pendant lights above the island for style and focus, and under-cabinet LEDs for functionality. The result was a space that looked elegant and worked beautifully at all times of day.

The Lesson: Great lighting is like jewelry for the kitchen—it elevates everything around it.


5. Adding a Central Island

The Problem: The kitchen lacked a central hub for cooking, prep, and gathering.

The Move: A new island became the anchor of the remodel. With extra seating, built-in storage, and a prep sink, it gave the family a multifunctional space that tied the whole kitchen together.

The Lesson: An island isn’t just furniture—it’s the stage where family life happens.


The Before and After

Walking into the finished kitchen was like entering an entirely different home. Where there was once frustration, there was now flow. Where clutter ruled, organization reigned. And most importantly, where the family once felt divided, they now came together.

A kitchen remodel in Sacramento isn’t just about cabinets and counters—it’s about creating a space that supports how you live. These five moves proved that thoughtful design can change not just a room, but the way a family connects every day.


Call to Action

Dreaming about your own kitchen remodel in Sacramento? Start with the smart moves that make the biggest impact. Connect with trusted local remodeling professionals who can help turn your story into a transformation you’ll love for years to come.

kitchen remodel Sacramento

5 Dekton Countertop Lessons I Learned the Hard Way

Categories Home Improvement

Dekton countertops are tough, sleek, and high-tech—but even this nearly indestructible surface comes with a few surprises. In this story-driven listicle, contractor and renovator Chip Gaines-style lessons reveal five real-world insights you won’t find on the sales brochure. From frying pan fails to knife mishaps, get the inside scoop on what makes Dekton a smart choice—and how to avoid rookie mistakes.

I’ve done more kitchen remodels than I can count—and I’ve made just about every mistake in the book. But few things humble a home improvement guy faster than thinking you’ve picked the perfect countertop… only to realize you didn’t ask the right questions.

Enter: Dekton countertops. I had heard the hype—ultra-durable, modern, almost indestructible. So naturally, I thought, “Perfect. Let’s throw it in.” Turns out, I learned a few things the hard way. And now? I wouldn’t go back.

So if you’re thinking about using Dekton in your kitchen, let me save you some growing pains with these five hard-earned lessons.


1. Yes, It’s Heat-Resistant—But Don’t Get Too Confident

I’d read that Dekton is incredibly heat-resistant. So what did I do? Set a fresh-from-the-oven cast iron pan directly on the surface during install day… to show off.

Did the Dekton crack? Nope. Chip? Not even close.
But what I didn’t count on? The pan left a subtle discoloration from the scorching oil on the bottom. Totally cosmetic, but still—a gentle reminder: just because it can take the heat doesn’t mean you should push it.

🔥 Lesson learned: Use a trivet. Always. Even superheroes have limits.


2. Cutting Directly on It Will Destroy… Your Knife

Dekton is harder than most natural stones. So in a moment of macho renovation energy, I diced veggies straight on the counter.

The Dekton? Untouched.
My brand-new chef’s knife? Ruined.

Think of it like this: Dekton is a countertop and a sharpening stone in one. Great for durability, bad for blade longevity.

🔪 Lesson learned: Treat it with respect. It doesn’t need protection—but your tools do.


3. It’s Nearly Bulletproof—but It Can Chip (If You Try Hard Enough)

I learned this one dropping a ceramic serving bowl edge-first onto a corner. That bowl didn’t survive. But neither did that sharp countertop edge.

Dekton is incredibly dense and impact-resistant… across the flat surface. Corners and edges, however? A little more vulnerable.

🛠️ Lesson learned: Ask your installer about rounded edges or chamfered profiles to avoid fragile points.


4. Installation Is Not a DIY Moment

I’m no stranger to heavy lifting or complicated installs—but Dekton installation? That’s another beast.

The slabs are thinner than granite but extremely dense—meaning they don’t flex at all. One wrong lift or uneven cabinet base and you’re looking at a crack before the first plate hits the shelf.

📏 Lesson learned: Hire certified Dekton installers. It’s not just about getting it in—it’s about getting it perfect.


5. It Looks Cold… But Feels Surprisingly Warm

I was worried Dekton would look too modern, too cold—like something from a spaceship kitchen. But paired with wood accents, warm lighting, and the right cabinetry?

It turned out to be one of the most visually versatile materials I’ve ever used. The soft matte finishes, subtle veining, and clean lines gave the kitchen a sleek-but-welcoming vibe.

🎨 Lesson learned: Don’t let the high-tech reputation fool you. With the right design, Dekton can feel just right.


Final Thoughts: Would I Choose It Again?

Absolutely. Despite a few bumps in the road (and a chipped corner I still blame on gravity), Dekton countertops have held up better than almost anything I’ve installed.

They’re:

  • Durable

  • Low-maintenance

  • Beautiful in a minimalist, high-end way

  • Resistant to heat, stains, scratches, and UV light

But the key is knowing how to work with the material—and not treating it like it’s magic. Because even the best surfaces come with a learning curve.

So if you’re dreaming about a kitchen that can keep up with real life? Dekton might just be your kind of countertop. Just maybe don’t test it with a frying pan. Trust me on that one.

Dekton countertops

Shower Replacement Costs: Why You Might Be Overpaying

Categories Home Improvement

Think you know what a shower replacement should cost? Think again. From hidden renovation fees to pricey upgrades you don’t really need, this fun and practical guide breaks down what homeowners really pay—and how to avoid common budget busters. If you’re planning a bathroom remodel, read this first and make sure your dollars go where they count.

Let’s talk about something no one really wants to deal with—but absolutely has to at some point: shower replacement costs. Yeah, I get it. It’s not as exciting as picking paint colors or deciding between matte black and brushed nickel fixtures. But if you’re not paying attention here, you could be flushing money down the drain—literally.

So grab your coffee, kick back, and let’s break it down Chip Gaines-style: practical, to the point, and with a little bit of friendly advice you didn’t know you needed.


💸 First Things First: What Should a Shower Replacement Actually Cost?

On average, replacing a shower costs anywhere from $1,500 to $8,000, but I’ve seen projects hit $10,000+ without blinking. Why the big range? Because “shower replacement” can mean a lot of different things depending on your home, your goals, and let’s be honest—your taste.

Here’s a quick price snapshot:

  • Prefab shower kit: $1,000–$2,500

  • Mid-range tile job: $3,000–$5,000

  • Custom luxury build: $6,000–$10,000+

But here’s the kicker—you might be paying more than you need to. And that’s where things get interesting.


⚠️ Are You Paying for Stuff You Don’t Need?

Let me hit you with a hard truth: homeowners often overpay for shower replacements because they don’t know where the money’s actually going.

Here are a few hidden renovation fees that sneak into your quote:

  • Permits & inspections – Sometimes required, sometimes overkill.

  • Demo surprises – That “little leak” behind your old tile? Could cost you extra.

  • Custom vs. standard sizing – Custom looks great, but that price tag? Yikes.

  • Designer finishes – Beautiful, but budget-busting if you’re not careful.

  • Relocating plumbing – Doable, but expensive. If your shower’s fine where it is, keep it there.

It’s kind of like buying a truck with every add-on imaginable when all you really needed was something to haul mulch on weekends.


🧱 What Are You Really Paying For?

Here’s the honest breakdown of where your money usually goes:

  • Materials – Tile, base, walls, doors, fixtures.

  • Labor – Demo, prep, plumbing, installation, sealing, and cleanup.

  • Disposal – Yep, tossing out your old shower has a price.

  • Waterproofing – Crucial, and where you do not want to cut corners.

  • Project management – If someone’s overseeing the job, you’re paying for their time too.

Knowing this helps you figure out where you can save—and where you shouldn’t skimp.


💡 Want to Save Money? Here’s How

Don’t worry—I’m not gonna tell you to grab a sledgehammer (unless you want to). But here are some smart ways to keep costs in check without sacrificing quality:

  1. Stick to standard sizes
    Custom means custom pricing. Standard units often look great and cost a lot less.

  2. Avoid moving plumbing
    Unless it’s necessary, keep pipes where they are. Moving them can blow your bathroom remodel budget wide open.

  3. Use large tiles or panels
    Bigger pieces = less grout, less labor, fewer chances for leaks.

  4. Get multiple quotes
    Don’t just go with the first contractor who calls you back. Three bids minimum!

  5. Bundle your upgrades
    If you’re doing more than just the shower, combining jobs can sometimes save on labor and logistics.


🛑 Don’t Let Emotions Blow Your Budget

Look, I love a gorgeous bathroom as much as the next guy—but emotion can be a real budget killer. That imported tile? Stunning. But does it really bring $30 per square foot of joy? Be honest with yourself about what really matters. Focus on function first, then add the flair.


🏠 Does a New Shower Add Value to My Home?

You bet. Bathrooms are one of the top places buyers look, and an outdated, grungy shower can tank your first impression. A fresh, modern shower can increase home appeal and get you 60–70% ROI on the cost when it’s time to sell. But remember—over-improving can backfire, especially if you’ve got a mid-range home in a modest neighborhood.


🧼 Final Rinse: What You Really Need to Know

If you’re replacing your shower, here’s the no-nonsense summary:

  • Know what you’re paying for

  • Watch out for hidden renovation fees

  • Don’t be afraid to question the quote

  • Smart choices = better budget control

  • You don’t have to go fancy to go functional

Bottom line? Shower replacement costs don’t have to drain your wallet. Be informed, be strategic, and don’t be afraid to ask tough questions. That’s how you get the most bang for your buck—without sacrificing quality.


🚀 Time to Upgrade?

If your shower’s looking tired, leaky, or stuck in a different decade, it’s probably time to act. But don’t go it alone. A trusted, experienced team can help you plan smart, spend wisely, and create a space that works for your life—not just your Pinterest board.

Shower Replacement Costs

7 No-Brainer Reasons to Start Your Bathroom Remodeling Project in Sacramento Today

Categories Home Improvement

If you’ve been thinking about bathroom remodeling in Sacramento but haven’t taken the leap, it’s time to make a move. Inspired by Chip Gaines’ hands-on, let’s-get-it-done style, this listicle breaks down 7 persuasive reasons to remodel your bathroom now. From boosting your home’s value and improving your daily routine to locking in the best contractors and slashing utility bills, remodeling is more than a design upgrade—it’s a lifestyle improvement.

Thinking about bathroom remodeling Sacramento but haven’t pulled the trigger yet? Let’s fix that.

I’m Chip Gaines, and here’s the deal: waiting on a remodel doesn’t make it cheaper, easier, or any less annoying every time you use that outdated sink. Whether your bathroom looks like it hasn’t been touched since 1991 or just doesn’t work for your life anymore—remodeling is one of the smartest moves you can make. And I’ve got the proof.

Here are 7 solid reasons to start your project now (and not someday).


1. It Adds Serious Home Value

Remodeling a bathroom in Sacramento can boost your home’s resale value big time. Midrange remodels often recoup 60–70% of the cost at resale—and can increase buyer interest by over 30%.

👉 Translation: You’re not just spending money. You’re investing it.


2. Your Bathroom Probably Isn’t Working for You

Sharing one sink? No storage? That one mysterious tile that’s been cracked for a decade?

Most homeowners don’t even realize how much time they lose—or how much stress they add—because their bathroom just doesn’t work well.

👉 A remodel can fix the layout, add storage, and bring peace to your morning routine.


3. It’s a Great Time to Lock in Contractor Availability

Sacramento’s home improvement market moves fast, especially in spring and summer. Good contractors? They book up.

👉 Starting your remodel now gives you first pick of quality professionals, not just whoever’s left in October.


4. Modern Fixtures Save Water—and Money

Old toilets and faucets waste gallons of water every day. New models are WaterSense-rated, look 100x better, and slash utility bills.

👉 Lower your footprint and your water bill? Win-win.


5. You Deserve a Space That Feels Good Every Day

Let’s be honest. The bathroom isn’t just functional—it sets the tone for your morning and helps you unwind at night.

👉 A beautiful, functional bathroom gives you one more reason to love being home.


6. You Can Start Small and Still Make a Big Impact

Don’t want to gut the whole space? You don’t have to. Even small upgrades—new tile, a fresh vanity, upgraded lighting—can totally change the feel.

👉 You set the pace. You set the budget. But you’ve got to start.


7. Sacramento Homes Are Competitive—This Gives You an Edge

Whether you’re staying or selling, a remodeled bathroom helps your home stand out in a competitive market.

👉 Why let a buyer think “eh, we’ll need to redo that” when they could walk in and think “this is perfect”?


✅ Final Thought

Still thinking about bathroom remodeling Sacramento? Think less—act more.

Because the only thing worse than a bathroom you don’t love… is living with it another year.

In true Chip Gaines fashion: roll up your sleeves, make the call, and let’s fix what needs fixing.


🧰 CALL TO ACTION

Ready to get started?
Our Sacramento-based remodeling team turns outdated bathrooms into functional, beautiful spaces—fast. Book your design consult today and let’s build something great.

7 No-Brainer Reasons to Start Your Bathroom Remodeling Project in Sacramento Today

Custom Entertainment Centers: Designing Spaces That Truly Work

Categories Home Improvement

Discover how a custom entertainment center blends beauty and function. Inspired by Hilary Farr and David Visentin, this guide shows how thoughtful design transforms living spaces.

When it comes to making a living room or media space shine, few elements have the impact of a well-designed custom entertainment center. It’s more than a place to house your TV—it’s about creating a focal point, maximizing storage, and adding personal style that reflects the way you actually live.

In the conversational and practical spirit of Hilary Farr—with a nod to David Visentin’s love of value-driven design—let’s dive into why a custom entertainment center is the upgrade your home is practically begging for.


Why Bother with a Custom Entertainment Center?

You might be thinking, “Can’t I just buy a big box from a furniture store?”

Sure—if you want a one-size-fits-all solution that doesn’t really fit anything.

Custom designs solve real problems:

  • Awkwardly placed electrical outlets

  • Unused vertical space

  • Cable management nightmares

  • Clutter from gaming consoles, speakers, and remotes

Hilary’s Take: A beautiful room needs beautiful function. You can’t just drop in a prefab piece and expect magic to happen.


Designing with Purpose

A great entertainment center isn’t just cabinetry—it’s an extension of your lifestyle.

Think about:

  • Your TV size (and future upgrades!)

  • Speaker integration for surround sound

  • Display zones for art, photos, or curated objects

  • Closed storage for hiding clutter (thank goodness)

David’s Reminder: When storage and style meet, your home not only looks better—it lives better.


Customization Options That Matter

  • Built-in lighting to highlight favorite items

  • Adjustable shelving to accommodate changing needs

  • Hidden compartments for wires, routers, and other eyesores

  • Material and finish selection to match your home’s personality

Pro Tip: Matte finishes create a sleek, modern look; rich woods add warmth and classic elegance.


Common Mistakes to Avoid

  • Forgetting ventilation: Electronics need airflow. Plan for it!

  • Not future-proofing: Design for bigger TVs and evolving tech.

  • Overcrowding the wall: Give your design room to breathe—negative space is your friend.

Hilary’s Advice: A space that feels “heavy” or “forced” quickly becomes visually exhausting. Think balance, not bulk.


Final Thoughts

Custom entertainment centers aren’t just trendy—they’re timeless solutions that transform how you use and enjoy your living space.

With thoughtful design (and a little Hilary and David inspiration), you can create a centerpiece that is beautiful, functional, and future-proof.

Call to Action

Ready to design a custom entertainment center that elevates your home’s style and simplifies your everyday life? Our expert team is here to bring your vision to reality—seamlessly and stylishly.

Painting Cupboards: A Simple Upgrade for Stunning Results
Kitchen Backsplash: Transform Your Space with Style and Function

7 Reasons to Upgrade to Cortona Maxx Waterproof Floors Today

Categories Home Improvement

Thinking of upgrading your floors? This urgent Vern Yip-style listicle highlights 7 compelling reasons why Cortona Maxx waterproof flooring is the smart choice now.

When it comes to transforming your home, flooring isn’t just an afterthought—it’s the foundation of your interior design. And if your current floors are dated, damaged, or difficult to maintain, it’s time for an urgent update. Enter Cortona Maxx waterproof floors—a modern, durable, and stylish solution that fits today’s homes and lifestyles.

In the spirit of Vern Yip’s polished yet practical approach to design, here are 7 compelling reasons you should stop putting off that flooring upgrade.


1. 100% Waterproof Performance

Life happens—spills, muddy shoes, pet accidents, and toddler chaos. Cortona Maxx floors are completely waterproof, making them ideal for kitchens, bathrooms, basements, and entryways.

Why It’s Urgent: Water damage isn’t always visible at first—but it’s costly to repair later.


2. Stunning Style Options

Choose from a variety of modern colors, textures, and finishes that mimic real hardwood or stone with impressive realism. Whether your style leans traditional, coastal, or modern minimalist, there’s a Cortona Maxx look to match.

Design Tip from Vern: Beautiful design begins at your feet—never underestimate the visual impact of great flooring.


3. Easy, Quick Installation

The click-lock system makes installation fast and clean, even over existing floors.

Urgency Bonus: Less downtime = faster transformation. You could literally redo your entire floor in a weekend.


4. Durable and Scratch-Resistant

Cortona Maxx stands up to heavy traffic, furniture movement, and pet claws without showing wear. It’s perfect for families, rental properties, and anyone who wants beautiful floors without babysitting them.

Analytical Fact: Long-term durability saves you from expensive replacements or refinishing.


5. Comfort and Quiet Underfoot

Thanks to an integrated sound-reducing pad, Cortona Maxx offers a quieter, more cushioned walking experience.

Why That Matters: It’s a noticeable luxury you feel every single day—especially in open floor plans or multi-story homes.


6. Low Maintenance Living

No waxing, no polishing, no special cleaners. Just a damp mop and you’re good to go. The surface resists stains and grime, keeping your space clean and stress-free.

Urgent Reminder: The more time you save cleaning, the more time you gain living.


7. Adds Instant Value and Appeal

New flooring is one of the easiest ways to increase your home’s resale value and attract potential buyers. Cortona Maxx offers the visual appeal of hardwood with performance modern homeowners crave.

Real Estate Insight: Buyers notice flooring first. Make it count.


Final Thoughts

Cortona Maxx waterproof flooring is more than a design upgrade—it’s a lifestyle improvement that combines beauty, functionality, and lasting value. The longer you wait, the more wear and tear you’re tolerating.

Call to Action

Ready to refresh your home from the floor up? Let our team help you install Cortona Maxx waterproof floors for a stylish, worry-free upgrade you’ll wish you did sooner.

7 Reasons to Upgrade to Cortona Maxx Waterproof Floors Today

Silestone Countertops: FAQ Style with a Dash of Martha Stewart Humor

Categories Home Improvement

Thinking about Silestone? This humorous FAQ guide in the style of Martha Stewart answers your biggest questions about durability, style, and maintenance.

So, you’re thinking about Silestone countertops, but you have questions. Lots of questions. Well, good! As Martha Stewart might say, “It’s a good thing” to be informed before inviting a surface into your kitchen that you’ll be wiping down for the next decade.

Let’s roll up our perfectly hemmed sleeves and tackle the most common Silestone questions—with answers that are as sharp as a chef’s knife (and twice as entertaining).


Q: What exactly is Silestone?

A: Think of it as quartz’s sophisticated cousin. It’s a hybrid surface made of about 90% natural quartz, mixed with resins and pigments.

In short: it’s hard, it’s gorgeous, and it doesn’t flinch at spilled wine.


Q: Is it really that durable, or is that just a marketing thing?

A: Oh, it’s real. Silestone is like the Hermione Granger of countertops: smart, reliable, and impossible to fluster.

  • Scratch-resistant? Yes.

  • Stain-resistant? Absolutely.

  • Doesn’t need sealing? You betcha.

Unless you’re regularly chopping lemons with a chainsaw, you’re in good hands.


Q: Can I put hot pots directly on it?

A: Technically, you can, but should you? Probably not.

Let’s put it this way: if your cast iron skillet just came off a bonfire, give it a trivet. Protect your investment. Even Martha doesn’t abuse her counters (and she grows her own lemons).


Q: What colors does it come in?

A: Silestone offers over 90 colors and several finishes. Whether you’re into classic white, deep charcoal, or something that looks like it belongs in an art gallery, there’s a Silestone shade with your name on it.

Bonus: it won’t fade or go out of style faster than last year’s TikTok dance trend.


Q: Is Silestone eco-friendly?

A: Absolutely! Thanks to the HybriQ+ technology, Silestone is made using:

  • Renewable energy

  • Recycled water

  • And up to 20% recycled materials

Translation: Your kitchen can sparkle without giving Mother Nature heartburn.


Q: How much maintenance is involved?

A: Minimal. Clean it with mild soap and water. That’s it.

No sealing. No special cleaner named after rare herbs. Just wipe and go—like magic, but domestic.


Final Thoughts

Silestone isn’t just beautiful and resilient—it’s practical, sustainable, and ready for whatever your life throws at it (including tomato sauce, coffee, and unexpected dinner guests).

Martha’s Advice: Your countertops should work hard, look good, and never require a panic cleaning session before guests arrive.

Call to Action

Curious if Silestone is right for you? Let our design team help you choose the perfect color, finish, and layout to make your kitchen look as fabulous as it is functional.

Silestone Countertops: FAQ Style with a Dash of Martha Stewart Humor

Remodeling Contractors in Sacramento: Your Questions Answered (With Chip-Level Humor Included)

Categories Home Improvement

From ‘Can I YouTube this?’ to budget realities, Chip Gaines tackles Sacramento’s top contractor questions with trademark humor. Discover why DreamLine cabinets and the right pro team make all the difference between chaos and kitchen glory.

So, you’ve finally decided to tackle that long-overdue kitchen redo—cue the dramatic music, coffee-fueled Pinterest sessions, and the terrifying search for remodeling contractors in Sacramento.

But before you swing a sledgehammer into a perfectly innocent wall (we’ve all been there), let me answer a few of the most common questions I get—from folks who want a Kitchen Makeover and a little sanity left at the end.


❓1. Do I really need a contractor? Or can I just YouTube it?

Oh sure, you could YouTube your way through a kitchen remodel. You could also try cutting your own hair or giving your cat a bath. Just because it’s possible, doesn’t mean it’s a good idea.

The right contractor:

  • Knows code (you can’t just put a light switch anywhere, friend)

  • Coordinates all the trades

  • Translates your dreams into something that won’t collapse under a cast iron skillet

So yes—hire a pro.


❓2. How do I find the right contractor?

Step 1: Ask your friends who just remodeled.
Step 2: Read the reviews like your life depends on it.
Step 3: Call them. If they sound like they’ve had five cups of coffee and love a good backsplash as much as I do—you’re close.

Want to skip all that? Just go straight to remodeling contractors in Sacramento with a track record of actually showing up, finishing the job, and not ghosting halfway through demo day.


❓3. What does a “real” kitchen makeover even include?

I’m glad you asked. It usually goes like this:

  • Tear out those 1990s cabinets (RIP honey oak)

  • Rethink your layout (because yes, the fridge can go somewhere logical)

  • Install new cabinets, like DreamLine’s Kitchen Makeover options

  • New counters, lighting, flooring, and probably a therapy session or two

It’s chaos—but in the best way. Like camping indoors… with dust.


❓4. What if I want “high-end” style but I’m on a “bologna sandwich” budget?

Welcome to the club. Here’s what you do:

  • Splurge smart. Cabinets and layout changes give you the biggest return.

  • Save on finishes. Tile, hardware, and even lighting can look expensive without being expensive.

  • DIY wisely. You can paint walls. You should not rewire your electrical box after watching three TikToks.

With the right Kitchen Makeover, you’ll get that designer look without selling your car. Or your soul.


❓5. How long is this gonna take, really?

Honest answer? Longer than you want but less time than you fear (if you have the right contractor).

Most kitchen remodels take:

  • 6–8 weeks for minor makeovers

  • 10–12 weeks if you’re doing layout changes, electrical, plumbing, or have decision paralysis over backsplash tile

Pro tip: Don’t move in with your in-laws “just for the remodel.” That never ends well.


✅ Chip’s Final Word

Here’s what I always tell folks: a remodel isn’t just about knocking down walls.
It’s about building up the way your home works for you.

So find the remodeling contractors in Sacramento who understand how to take that big kitchen dream and turn it into an everyday reality.

With the right people, the right plan, and the right Kitchen Makeover, you won’t just upgrade your kitchen—you’ll upgrade your life.

Cabinets near me
Painting Cupboards: A Simple Upgrade for Stunning Results

Painting Cupboards: A Simple Upgrade for Stunning Results

Categories Home Improvement

Painting cupboards is an affordable and eco-friendly way to upgrade your kitchen or bathroom. This simple project involves cleaning, sanding, and applying a fresh coat of paint to transform your space. Choose from timeless neutrals, bold colors, or modern finishes to match your style. With proper preparation and the right materials, painting cupboards is a budget-friendly option that saves time and money while delivering stunning results.

Transforming your home doesn’t always require an extensive renovation. Sometimes, a fresh coat of paint on your cupboards can be enough to rejuvenate your kitchen or bathroom. Painting cupboards is an affordable, customizable, and impactful way to upgrade your space while expressing your personal style.

Why Paint Your Cupboards?

  1. Cost-Effective Transformation
    Painting cupboards is a budget-friendly alternative to refacing or replacing them. You can achieve a modern, refreshed look without spending a fortune.

  2. Wide Range of Customization
    With paint, the possibilities are endless. Whether you prefer soft neutrals, bold pops of color, or classic whites, your choice can completely redefine the mood of your room.

  3. Eco-Friendly Option
    Repainting existing cupboards reduces waste and makes use of what you already have, aligning with sustainable home improvement practices.

Preparing Your Cupboards for Painting

  1. Remove Doors and Hardware
    Take off cupboard doors, drawer fronts, and hardware. This ensures an even and professional-looking finish.

  2. Clean Thoroughly
    Use a degreaser to remove grease, dirt, and grime from the surfaces. A clean base is crucial for paint adherence.

  3. Sand the Surfaces
    Lightly sand the cupboards to remove the glossy finish and create a surface the paint can cling to.

  4. Apply Primer
    A good-quality primer ensures better paint adhesion and a more durable finish, especially on wood or laminate surfaces.

Choosing the Right Paint

  1. Cabinet-Specific Paint
    Look for paints designed for cabinets, which are more durable and resistant to wear.

  2. Finish Matters

    • Matte Finish: Ideal for a modern, minimalist look but may show stains more easily.
    • Satin or Semi-Gloss: Durable, easy to clean, and works well for high-traffic areas like kitchens.
    • High-Gloss Finish: Reflects light beautifully and adds a sleek, contemporary touch.
  3. Color Selection

    • White and Neutral Tones: Timeless and versatile, perfect for brightening small spaces.
    • Dark and Moody Shades: Create drama and contrast, adding sophistication to larger kitchens.
    • Vibrant Colors: Inject energy and personality, making the cupboards a focal point.

Painting Techniques

  1. Use a Quality Brush and Roller

    • A small angled brush works well for corners and edges.
    • A foam roller helps achieve a smooth finish on flat surfaces.
  2. Apply Thin Coats
    Two to three thin coats are better than one thick coat. Allow each layer to dry completely before adding the next.

  3. Patience with Drying
    Let the paint cure fully before reattaching doors and hardware. This prevents smudges and ensures durability.

Styling Tips After Painting

  1. Upgrade the Hardware
    Pair your newly painted cupboards with updated handles or knobs for a fresh, cohesive look.

  2. Add Open Shelving
    Removing some cupboard doors to create open shelving adds depth and a modern vibe.

  3. Incorporate Lighting
    Under-cabinet or interior lighting highlights your new paint job and elevates the overall ambiance.

Benefits of Painting Cupboards Over Replacing

  1. Budget-Friendly
    Replacing cupboards can be expensive and time-consuming. Painting allows you to make a big impact without the hefty cost.

  2. Minimal Disruption
    Painting is less invasive and quicker than full cabinet replacements, letting you enjoy your upgraded space sooner.

  3. Preserves Original Character
    If your cupboards have unique design features or vintage charm, painting allows you to maintain their character while modernizing them.

Professional vs. DIY

While painting cupboards can be a satisfying DIY project, hiring professionals ensures a flawless finish, especially for larger kitchens or intricate designs. Professionals have the tools and expertise to tackle challenges like uneven surfaces or tricky corners.

Conclusion

Painting cupboards is an accessible and impactful way to breathe new life into your home. With proper preparation, the right materials, and a clear vision, you can create a space that feels brand new while staying within budget. Whether you prefer the hands-on approach of DIY or the precision of professional help, this simple upgrade will leave a lasting impression.

Painting Cupboards: A Simple Upgrade for Stunning Results